

 English
 русский
 Español
 Français
 عربى
عربى 简体中文
简体中文
Can a Coating Barrel Mold Boost Production
2026-03-27
In manufacturing shops that turn out parts for coating lines, injection molding keeps showing up as a go-to method for getting consistent shapes and solid surface finishes. When it comes to barrel-shaped pieces, the mold you pick can make a real difference in how the whole run goes. A high-precision coating barrel injection mold is the kind of tool built specifically for forming those barrels, handling the details that matter for later coating steps. Plenty of production teams run into the same questions when they start looking at one: what it actually does, how the process plays out on the floor, and whether it slots into what they already have going. This guide lays out the straight details based on everyday shop situations, so managers and operators can get a clear picture without wading through theory. We walk through the main points—what the mold looks like, how to pick one that fits, why it might make sense in a line, where to set it up, when the timing feels right, and some down-to-earth tips for running it day to day. The idea is to give you stuff you can actually use when you're standing in the middle of a busy shift trying to decide what comes next.
What Is a High-Precision Coating Barrel Injection Mold and How Does It Work
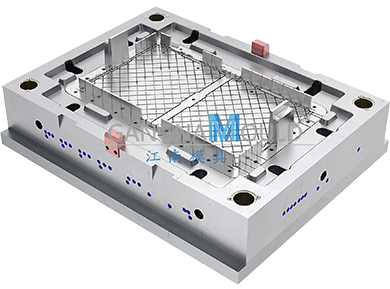
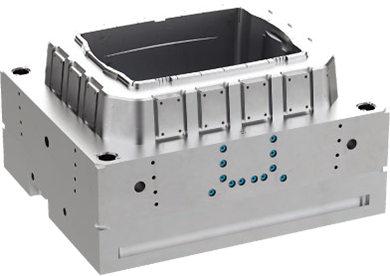
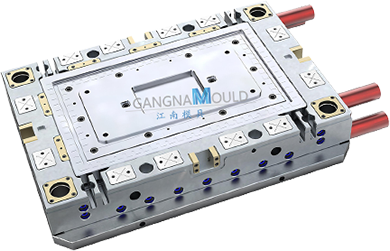
A high-precision coating barrel injection mold is a two-part tool that shapes barrel-style components by forcing molten material into a cavity under pressure. One half carries the outer cavity that forms the barrel's exterior, while the other holds the core that creates the hollow inside. The machining on both sides keeps the walls even and the ends square, which lines up well with the coating work that usually follows. Cooling lines snake through the mold body to pull heat away at a steady pace, so the material sets without building up too much stress inside.
Here's how it runs in a typical setup. Plastic pellets or polymer compound drop into the machine's feeding barrel, get heated until they flow, and then a screw pushes the material forward. It shoots into the closed mold through gates or runners, filling from one end or several points depending on the mold design. Once the cavity fills, the material sits and cools for a controlled stretch of time until it holds its shape. Then the mold opens, ejector pins push the barrel out, and the cycle starts over with the mold closing again. Operators keep an eye on injection pressure and cooling duration through the machine panel, tweaking them a bit based on the material and the barrel size they're running that day.
On the floor, the mold includes small vents that let trapped air escape during the fill, cutting down on surface marks. A lot of these molds also come with swap-in inserts, so you can adjust barrel length or diameter slightly without pulling the whole tool off the machine. Everything stays contained at the molding station, which means less material ends up on the floor and cleanup stays quick. After a handful of cycles, the rhythm feels pretty normal: load the material, close the mold, inject, wait for cool-down, open up, and pull the part. The whole thing keeps heat and moving pieces inside the tool, so the area around the machine stays easier to work in. In the end, the mold takes raw stock and turns it into finished barrels in a steady loop, ready for the next station in the coating or assembly line.
How to Select a High-Precision Coating Barrel Injection Mold for Your Needs
Picking the right mold starts with looking hard at what your shop actually runs week after week. Measure your usual output of barrel parts and list the sizes you need, because the mold has to match the clamping force and shot volume of the injection machine you already own. Get that part wrong and you end up with short shots or extra flash that slows everything down. The material you use counts too—some polymers move differently in the mold, so gate placement and surface finish on the tool need to match how the stuff flows.
After that, think about the precision you need on the barrel walls and sealing faces. Tighter tolerances on the mold help keep parts steady from batch to batch, but they also mean you'll check wear areas more often. Teams usually sit down and make a short list that includes expected cycle times, since shorter cycles can push more parts through without shifting the whole layout. Walk the floor during a regular shift and note exactly where the current tools cause hold-ups, like slow ejection or messy cleaning. That quick check usually shows whether a single-cavity or multi-cavity mold would work better for your pace.
Power and space fit into the picture as well. The mold needs to sit cleanly on the machine platen, and the cooling connections should hook up to the water lines you already have without extra equipment in most cases. Look at how easy it is to reach the parts that need cleaning between material changes. If your shop switches polymers often, quick-release inserts can save a lot of time during changeovers. Write down the exact steps the mold will handle each day and see how the hopper feed or runner layout lines up with your current material carts.
Talk to the operators who will actually run it—they'll tell you if side actions for any undercuts feel natural or if a straight-pull design keeps things simpler. Keep the whole selection focused on real daily work instead of long spec sheets. Many shops run a short trial with sample barrels to make sure the mold holds up under normal conditions before they lock it in for full production.
Why Consider a High-Precision Coating Barrel Injection Mold in Your Manufacturing Line
Shops start looking at a new mold when they spot parts coming out with uneven walls or when the order book starts filling up faster. A high-precision coating barrel injection mold can help steady the filling and cooling steps, which keeps dimensions more consistent from one cycle to the next. That steadiness means fewer pieces need rework or get scrapped, so material use stays easier to plan over time. In lines that prep parts for coating, even wall thickness makes a difference because it affects how the next layers stick during finishing.
The mold slides into most setups without tearing up the floor plan. Plenty of versions are sized to work with standard injection machines, so adding it usually just means bolting the tool in place and hooking up the utilities. This leaves the team free to handle quality checks and packing instead of constantly tweaking the molding station. For places running two or three shifts, the steady cycle makes it simpler to hand off between crews because each barrel looks and measures about the same.
Workflow planning gets easier too. When barrel forming sits in the middle of a bigger coating or assembly sequence, a dedicated mold lets other stations keep moving while the machine runs. The closed process keeps the immediate area cleaner, which fits right in with regular shop housekeeping. Operators often say their daily schedule feels smoother because the molding step no longer creates random delays from manual fixes.
In shops that see ups and downs with seasonal work or special orders, the mold gives a way to adjust volume by changing cycle settings instead of rebuilding the line. That kind of flexibility helps keep planning straightforward without big extra spending on machines. The decision comes down to how the tool fits with what you already do, offering a practical way to handle common issues around part consistency and station flow.
Where to Place a High-Precision Coating Barrel Injection Mold in Your Facility
Deciding where the mold goes usually starts with tracing how material moves through the shop. A lot of operations set it close to raw material storage so pellets travel only a short distance before hitting the machine. That keeps the route simple from storage to molding and then on to the next steps. In smaller shops the station often sits right next to inspection tables, so one area can handle prep while the machine keeps running.
Bigger facilities might give it its own corner on the main floor with enough room for mold swaps and people walking around. Standard clearances around the machine usually fit the mold without cutting into walls or concrete. Some teams place it near the cooling or finishing area to shorten the carry for fresh barrels and keep temperature steady during the move to coating prep. When several lines run at once, the mold can work as a shared station that rolls into place only for barrel jobs.
Take a quick walk around your current layout first. Look for a spot that gives easy access but stays out of the way of other work. Leave space on all sides for safety and for moving carts or tools. Being near power and cooling water makes the hookup quick, so most setups finish in a single shift. Once the mold is sitting there, crews often spot small tweaks—like shifting a conveyor or moving an inspection bench—that smooth out the whole area.
The mold design fits most standard manufacturing spaces, so big building changes are rarely needed. Shops that run it only part of the time can pick a spot that lets them disconnect and store it easily during quiet periods. In every case, the aim is a layout that keeps material flowing from incoming stock through the mold and straight to the next process without extra steps.
When to Consider Adding a High-Precision Coating Barrel Injection Mold
The right moment to bring the mold in often lines up with clear signals from the production floor. Many facilities check their setup when barrel orders start climbing or when older tools begin wearing in ways that affect part consistency. At that point, a dedicated high-precision coating barrel injection mold can help hold output steady without stretching shifts or pulling in extra hands. Another signal shows up when coating or assembly feedback points to dimension changes that current methods cannot fix.
Seasonal or project work also plays into timing. Shops that know their busy periods are coming may look at the mold a few weeks ahead so there's time to get it in and let operators get comfortable. This prep keeps the line from scrambling when demand picks up. The review usually includes a fast look at recent cycle times and defect logs to see if the new mold would clear the spots where things slow down.
Teams also think about the mold during planned equipment updates or line expansions. If older tools need frequent fixes that stop the schedule, moving to a precision barrel mold can cut those unplanned pauses. The check involves pulling together production notes and marking where delays or quality hiccups gather around the current molding station. That information makes the timing decision clearer and helps the changeover go smoother.
For shops testing new coated-barrel products, the mold comes into play once prototypes show that repeatable forming is needed. Bringing it in early lets the team dial in settings before full runs start. The call finally comes down to matching the mold to the real needs showing up in daily work, so it arrives when it can help without adding new headaches.
Tips for Operating a High-Precision Coating Barrel Injection Mold
Running the mold day to day falls into a pattern that feels familiar pretty fast. Operators start by making sure the tool is clean and lined up square in the machine. Material goes into the hopper following the usual recipe, and the machine warms up to the right range. When everything stabilizes, the cycle kicks off—mold closes, material injects, and cooling holds for the set time. Watching the panel lets you make small changes to pressure or timing if the material acts different because of shop temperature or humidity.
After the part ejects, the barrel moves to a rack or conveyor for the next step. A quick look confirms the surfaces are even and clean before starting the next shot. Between cycles, a light wipe-down clears any leftover material and keeps buildup from forming. Safety stays basic: gloves for warm pieces and clear space around the machine while it runs.
Many shops hang a short checklist right by the station that lists load, start, watch, eject, and clean. New people follow it and turn out steady parts from their first shifts. With time, operators pick up little habits like checking vents for blockages or noticing how the material flows on fill. Those notes help with tiny adjustments that keep the cycles even.
Maintenance stays on a regular schedule too. At shift end, surfaces get wiped and contact points checked for wear. Cooling lines get flushed if scale shows up, and moving parts receive a light coat of the recommended lubricant. A simple notebook tracking cycle counts and any observations gives a handy record for planning deeper service. When the mold sits idle, it goes under covers to stay clean and dry.
Small issues like light flash or short fills usually tie back to temperature swings or material moisture. Standard checks handle most of them and keep the station reliable. The whole approach treats the mold as one regular stop on the line, where steady daily attention keeps things moving without surprise stops.
The points covered here walk through the practical side of working with a high-precision coating barrel injection mold, from what it does to how you pick one, why it might fit, where it belongs, when to add it, and how to run it every day. Each section takes up the questions that come up in real manufacturing shops and gives details grounded in daily work. Facility teams can use this to weigh the tool against their current space, volume, and goals. As production shifts over time, these notes can help make small adjustments that keep the line steady through different batch sizes and schedules. Manufacturers who want to talk through how this type of mold might work in their own setup are welcome to reach out for more conversation on fitting it into their facilities.
Previous Post
How Does a Stool Mould Shape Plastic Seating Production
Next Post
Can Innovative Mold Design Revolutionize Household Plastic Products?
Our Products.
Quick Links
Contact Information
- ADD: No. 268, Jinchuan Road, Xinqian Street, Huangyan District, Taizhou City, Zhejiang Province, China
- TEL: +86-(0)576-89191888
- E-MAIL: gm@gangnammould.com
Mobile
Copyright © Zhejiang Huangyan Jiangnan Mould Factory All Rights Reserved.

PP Mould
